
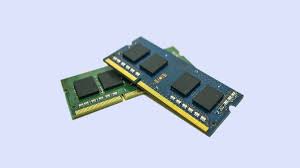
DRAM Memory Upgrade: Boosting Performance and Efficiency
In today’s fast-paced digital world, where multitasking and resource-intensive applications have become the norm, having a computer system that can keep up with demanding tasks is essential. One effective way to enhance your system’s performance is by upgrading your DRAM (Dynamic Random Access Memory).
DRAM, also known as main memory or system memory, plays a crucial role in storing data that your computer needs to access quickly. When you launch applications or perform tasks on your computer, the data required for these operations is loaded into the DRAM for faster access. Upgrading your DRAM can significantly improve your system’s overall speed and responsiveness.
One of the primary benefits of a DRAM memory upgrade is increased multitasking capabilities. With more memory available, your computer can efficiently handle multiple applications simultaneously without experiencing slowdowns or crashes. This is particularly beneficial for professionals who rely on resource-hungry software such as video editing tools, graphic design software, or virtual machines.
Furthermore, an upgraded DRAM capacity allows for smoother and faster data transfer between the CPU (Central Processing Unit) and other components of your computer. This results in reduced latency and improved overall system efficiency. Tasks like opening large files or running complex calculations become quicker and more seamless.
Another advantage of a DRAM memory upgrade is enhanced gaming performance. Games nowadays demand substantial amounts of memory to load complex textures, render high-resolution graphics, and process real-time physics simulations. By upgrading your DRAM capacity, you provide your gaming rig with the necessary resources to run games smoothly at higher settings without lag or stuttering.
It’s important to note that not only does upgrading the capacity of your DRAM matter but also its speed. Higher-speed modules can deliver data at faster rates, further improving overall system performance. When choosing a new DRAM module, ensure compatibility with your motherboard and consider opting for modules that match or exceed the specifications recommended by your computer manufacturer.
Upgrading your DRAM memory is a relatively straightforward process. However, if you’re uncertain about the compatibility or installation process, it’s always a good idea to consult the manufacturer’s documentation or seek professional assistance. Additionally, be sure to power off and unplug your computer before attempting any hardware upgrades.
In conclusion, a DRAM memory upgrade can breathe new life into your computer system by boosting its performance and efficiency. Whether you’re a professional seeking to optimize productivity or a gamer looking for smoother gameplay, upgrading your DRAM is an investment that can deliver noticeable improvements. So why wait? Upgrade your DRAM today and experience the benefits of a faster, more responsive computing experience.
8 Essential Tips for Upgrading Your Computer’s RAM
- Make sure your computer is compatible with the type of RAM you are purchasing.
- Check your motherboard’s manual to determine the maximum amount of RAM it can support.
- Purchase RAM that matches the speed and latency requirements of your computer system.
- Consider buying a matched pair or kit of memory modules for best performance and compatibility.
- Unplug all power cables from your computer before performing any upgrades or maintenance on it.
- Ground yourself by touching a metal object before handling any internal components to avoid static electricity damage to sensitive components like memory modules, CPU, etc..
- Install each memory module into its corresponding slot in order to achieve dual channel configuration (if applicable).
- Once installation is complete, power on your system and enter BIOS settings to verify that the new RAM has been recognized correctly by the operating system
Make sure your computer is compatible with the type of RAM you are purchasing.
Ensuring Compatibility: Crucial Tip for DRAM Memory Upgrades
When it comes to upgrading your DRAM memory, one crucial tip that you should always keep in mind is to ensure compatibility between your computer and the type of RAM you are planning to purchase. While upgrading your memory can significantly enhance your system’s performance, it’s essential to choose the right type of RAM that matches your computer’s specifications.
Before making any purchase, take a moment to research and understand the specific requirements of your computer. Start by identifying the type of RAM currently installed in your system. This information can usually be found in the user manual or by checking the manufacturer’s website.
There are different types of RAM available on the market, such as DDR3, DDR4, and so on. Each type has its own specific features and is designed for different generations of computer systems. It’s important to select a RAM module that is compatible with your motherboard’s memory slots and supports the same type as your existing RAM or the recommended type specified by your computer manufacturer.
Additionally, consider other factors like memory speed (measured in MHz) and module capacity (measured in gigabytes). These specifications should align with what your motherboard supports or what is recommended for optimal performance. Choosing a higher speed or larger capacity than what is supported may result in compatibility issues or underutilization of the new RAM.
If you’re unsure about which type of RAM is compatible with your system, consulting with a professional or reaching out to customer support from reputable manufacturers can provide valuable guidance. They can help you identify suitable options based on your specific requirements and ensure that you make an informed decision.
By taking this crucial step of ensuring compatibility between your computer and the type of RAM you are purchasing, you can avoid potential issues such as system instability, boot failures, or even damage to components. It ensures that you get a seamless upgrade experience while maximizing the benefits of increased memory capacity.
In conclusion, before embarking on a DRAM memory upgrade, make sure to do your homework and ensure compatibility between your computer and the type of RAM you plan to purchase. This simple yet crucial tip will help you make the right choice, ensuring a smooth upgrade process and optimal performance gains for your system.
Check your motherboard’s manual to determine the maximum amount of RAM it can support.
Maximizing Your DRAM Memory Upgrade: Check Your Motherboard’s Manual
When it comes to upgrading your DRAM memory, one crucial step that often gets overlooked is checking your motherboard’s manual to determine the maximum amount of RAM it can support. This simple tip can help you make informed decisions and ensure that you’re getting the most out of your memory upgrade.
Motherboards have specific limitations on the amount of RAM they can handle. These limitations are determined by factors such as the motherboard’s chipset, socket type, and overall design. By consulting your motherboard’s manual, you can find valuable information about its supported memory types, capacities, and configurations.
To begin, locate the model number or name of your motherboard. This information is typically printed directly on the board itself or can be found in your computer’s documentation. Once you have this information at hand, search for the manual online or refer to any physical documentation that came with your computer.
In the manual, look for a section dedicated to memory specifications or system requirements. Here, you will find details about the maximum amount of RAM that your motherboard can support. It may be listed as a total capacity (e.g., 32GB) or as individual module limits (e.g., 4GB per slot). Take note of these figures as they will serve as a guideline for selecting the appropriate memory modules for your upgrade.
By knowing your motherboard’s maximum RAM capacity, you can avoid purchasing more memory than your system can handle. This prevents compatibility issues and ensures that all installed modules are recognized and utilized effectively by your computer.
Additionally, understanding your motherboard’s limitations allows you to plan for future upgrades. If you’re considering expanding your memory further down the line, knowing the maximum capacity upfront helps in selecting a motherboard that supports future expansion options.
Keep in mind that while checking your motherboard’s manual is essential for determining its maximum RAM capacity, it doesn’t provide details about specific memory module compatibility or speed requirements. For these aspects, it’s recommended to refer to the memory manufacturer’s specifications or seek guidance from a trusted computer technician.
In conclusion, before embarking on a DRAM memory upgrade journey, take a moment to consult your motherboard’s manual. By doing so, you’ll gain valuable insights into its maximum RAM capacity and make informed decisions when selecting memory modules. This small step can save you time, money, and potential compatibility issues down the line. Happy upgrading!
Purchase RAM that matches the speed and latency requirements of your computer system.
When upgrading the DRAM memory in your computer, it’s crucial to consider not only the capacity but also the speed and latency of the RAM modules. Matching these specifications with your computer system’s requirements can make a significant difference in performance.
The speed of RAM, measured in megahertz (MHz), determines how quickly data can be transferred between the memory module and other components of your computer. Higher-speed RAM allows for faster data access and retrieval, resulting in improved overall system responsiveness.
To determine the appropriate RAM speed for your system, consult your computer’s documentation or manufacturer’s website. It will typically provide you with information on the maximum supported RAM speed. Ensure that you purchase modules that match or exceed this specification to fully utilize your system’s capabilities.
Another important consideration is the latency of the RAM. Latency refers to the time it takes for data to travel from one point to another within the memory module. Lower latency indicates faster response times and better performance.
When purchasing new RAM, check for its latency rating, usually represented as a series of numbers (e.g., CL15 or CL16). The lower these numbers are, the better. However, keep in mind that different generations of DDR (Double Data Rate) RAM may have different latency standards. Make sure to choose modules that align with your system’s requirements.
Matching both speed and latency when upgrading your DRAM ensures optimal compatibility and performance. Mismatched specifications can lead to compatibility issues or underutilization of your system’s capabilities.
Before making a purchase, research reputable brands and read customer reviews to ensure reliability and compatibility with your specific computer model. It’s also worth considering any warranty or return policies offered by manufacturers or retailers in case any issues arise during installation or usage.
In conclusion, when upgrading DRAM memory, don’t overlook factors like speed and latency. Purchasing RAM modules that match the speed and latency requirements of your computer system can maximize its performance potential. Take the time to research and choose wisely, and you’ll be rewarded with a faster, more efficient computing experience.
Consider buying a matched pair or kit of memory modules for best performance and compatibility.
When it comes to upgrading your DRAM memory, one important tip to keep in mind is to consider purchasing a matched pair or kit of memory modules. This simple step can greatly enhance the performance and compatibility of your system.
A matched pair or kit refers to two or more memory modules that are specifically designed and tested to work together seamlessly. These modules are carefully selected and configured by the manufacturer to ensure optimal performance when used in tandem. By using a matched pair or kit, you can avoid potential compatibility issues that may arise when mixing different memory modules.
One immediate benefit of using a matched pair or kit is improved stability. When you install identical memory modules, your computer’s motherboard can synchronize their operation more effectively. This synchronization helps prevent timing conflicts and reduces the likelihood of system crashes or errors. The result is a more reliable computing experience with fewer unexpected interruptions.
Furthermore, using a matched pair or kit of memory modules can maximize the performance potential of your system. Memory-intensive tasks, such as running multiple applications simultaneously or handling large datasets, can benefit from the increased bandwidth provided by matched modules. With synchronized memory modules, data transfer between the CPU and RAM becomes smoother and more efficient, resulting in faster overall system performance.
Compatibility is another crucial aspect to consider when upgrading your DRAM memory. Mixing different brands or models of memory modules may lead to compatibility issues that can affect stability and performance. By opting for a matched pair or kit from a reputable manufacturer, you ensure that the modules have been rigorously tested together for compatibility with various systems.
It’s worth noting that some motherboard manufacturers explicitly recommend using matched pairs or kits for optimal performance. Therefore, it’s advisable to consult your computer’s documentation or visit the manufacturer’s website to determine if they have any specific recommendations regarding memory upgrades.
In conclusion, when upgrading your DRAM memory, considering buying a matched pair or kit of memory modules can greatly enhance your system’s performance and compatibility. By investing in modules that have been designed to work together seamlessly, you can enjoy improved stability, increased performance, and a smoother computing experience. So, before making your next memory upgrade, remember the benefits of using matched modules and make an informed decision for the best results.
Unplug all power cables from your computer before performing any upgrades or maintenance on it.
Essential Tip: Unplug Power Cables Before Upgrading Your DRAM Memory
When it comes to performing upgrades or maintenance on your computer, one crucial tip that should never be overlooked is to unplug all power cables before starting any work. This is especially important when upgrading your DRAM (Dynamic Random Access Memory) memory modules.
Why is this step so critical? Well, working with live power can pose significant risks, not only to your own safety but also to the integrity of your computer components. By disconnecting the power cables, you ensure that there is no electrical current flowing through the system, minimizing the chances of accidental damage or injury.
Upgrading your DRAM memory usually involves physically removing and replacing modules inside your computer. These modules are sensitive electronic components that can be easily damaged by static electricity or power surges. By unplugging the power cables, you eliminate the risk of electrical discharge that could harm your DRAM or other internal parts.
Additionally, when you unplug the power cables, you prevent any potential short circuits from occurring during the upgrade process. Accidentally touching live wires while handling delicate components can lead to irreversible damage to both your computer and yourself. Safety should always be a top priority when working with any electronic device.
To ensure a safe and successful DRAM memory upgrade:
- Shut down your computer properly using the operating system’s shutdown procedure.
- Once shut down, switch off the main power supply if applicable.
- Unplug all power cables connected to your computer from wall outlets or surge protectors.
- Wait for a few minutes to allow any residual electrical charge in the system to dissipate.
- Proceed with caution while handling and installing new DRAM memory modules.
Remember, even if you’re confident in your technical skills, taking precautions like unplugging power cables is a simple yet effective way to protect yourself and your equipment from potential harm.
In conclusion, before embarking on any upgrades or maintenance tasks involving your computer, including DRAM memory upgrades, always remember to unplug all power cables. This small but essential step ensures your safety and prevents damage to sensitive components. By following this tip, you can confidently upgrade your DRAM memory and enjoy improved performance without unnecessary risks.
Ground yourself by touching a metal object before handling any internal components to avoid static electricity damage to sensitive components like memory modules, CPU, etc..
Protect Your Components: Ground Yourself Before Upgrading DRAM Memory
When it comes to upgrading your computer’s DRAM memory, taking precautions to avoid static electricity damage is crucial. Static electricity can pose a significant risk to sensitive components like memory modules and CPUs. To safeguard against potential damage, it is essential to ground yourself before handling any internal components.
Static electricity is an electric charge that builds up on objects due to friction or contact with other charged objects. It can discharge suddenly and cause harm to electronic components, leading to malfunctions or even permanent damage. However, by following a simple grounding procedure, you can minimize this risk and ensure a safe upgrade process.
Before you begin handling the internal components of your computer, take a moment to ground yourself properly. Here’s how:
- Power off your computer and unplug it from the electrical outlet.
- Find a metal object that is grounded, such as the metal frame of your computer case or a grounded metal surface nearby.
- Touch the metal object firmly for a few seconds. This action helps discharge any built-up static electricity in your body.
- Remember to avoid wearing clothing made of synthetic materials, as they tend to generate more static electricity.
By grounding yourself before touching any internal components, you create an equal electrical potential between your body and the computer’s parts. This equalization prevents sudden discharges of static electricity that could potentially harm delicate components like memory modules or CPUs.
It’s worth noting that while grounding yourself is an essential precautionary measure, it should be complemented by other best practices when handling computer hardware. For instance:
– Handle memory modules and other components by their edges rather than touching their pins or connectors directly.
– Avoid placing components on surfaces prone to static buildup (e.g., carpets).
– Store spare memory modules in anti-static bags when not in use.
By adhering to these guidelines and grounding yourself properly before upgrading your DRAM memory or handling any internal components, you significantly reduce the risk of static electricity damage. Taking these precautions ensures a smooth and safe upgrade process, allowing you to enjoy the benefits of improved performance without unnecessary risks.
Remember, prevention is always better than cure when it comes to static electricity. So, before you embark on your next DRAM memory upgrade adventure, take a moment to ground yourself and protect your valuable computer components from potential harm.
Install each memory module into its corresponding slot in order to achieve dual channel configuration (if applicable).
Maximizing Performance: Installing DRAM Memory Modules for Dual Channel Configuration
When it comes to upgrading your DRAM memory, there’s a simple tip that can make a noticeable difference in your system’s performance: installing each memory module into its corresponding slot to achieve a dual channel configuration, if applicable.
Dual channel configuration is a memory technology that allows for increased data transfer rates between the memory modules and the CPU. By utilizing two or more identical memory modules, the system can access data simultaneously from multiple channels, resulting in improved overall performance.
To take advantage of this feature, it’s essential to install the memory modules correctly. Most motherboards have color-coded slots or labels indicating which slots should be used for dual channel configuration. Typically, these slots are either alternating colors (e.g., black and blue) or labeled as “A1” and “B1” or “A2” and “B2.”
To achieve dual channel configuration:
- Refer to your motherboard’s manual: Different motherboards may have specific instructions on which slots to populate first. It’s always a good idea to consult the manual provided by your motherboard manufacturer for accurate guidance.
- Match the modules: Ensure that you are using identical memory modules in terms of capacity, speed, and timings. Mismatched modules may not work together in dual channel mode or could potentially cause stability issues.
- Install in corresponding slots: If your motherboard has two pairs of slots (e.g., A1/A2 or B1/B2), insert one module into slot A1 (or B1) and the other module into slot A2 (or B2). This arrangement allows the system to access both memory channels simultaneously.
- Securely fasten the modules: Gently push down on each module until it clicks into place. Make sure they are firmly seated in their respective slots to ensure proper contact and avoid any connection issues.
By following these steps, you can optimize your system’s memory performance and take full advantage of the benefits offered by dual channel configuration. Your computer will be able to handle data-intensive tasks more efficiently, resulting in faster response times and smoother multitasking.
Remember, not all systems support dual channel memory configurations. It’s important to check your motherboard specifications to confirm if this feature is available. If it is, taking the time to correctly install your memory modules can lead to a significant boost in overall system performance.
So, when upgrading your DRAM memory, don’t forget this valuable tip. Install each memory module into its corresponding slot for dual channel configuration (if applicable), and unlock the potential for improved speed and efficiency in your computer system.
Once installation is complete, power on your system and enter BIOS settings to verify that the new RAM has been recognized correctly by the operating system
Maximizing the Benefits of Your DRAM Memory Upgrade: Verifying Recognition in BIOS
After successfully installing your new DRAM memory upgrade, it is crucial to ensure that your operating system recognizes the upgraded RAM. This step is essential to fully optimize your system’s performance and take advantage of the increased memory capacity.
To verify proper recognition, you need to access the BIOS (Basic Input/Output System) settings of your computer. The BIOS is a firmware interface that allows you to configure various hardware settings, including memory detection. Here’s how you can do it:
- Power on your computer and wait for the initial boot screen to appear. Typically, this screen displays information about your system’s hardware components and provides options for accessing the BIOS.
- Look for a prompt or key combination to enter the BIOS setup. Common keys include F2, Del, Esc, or F10. The specific key may vary depending on your computer manufacturer or motherboard model. If you’re unsure, consult your computer’s documentation or search online for the correct key.
- Once you’ve identified the correct key or prompt, press it repeatedly during startup until you enter the BIOS setup utility.
- Inside the BIOS setup utility, navigate using your keyboard (arrow keys) and look for a section related to memory settings or configuration.
- Locate an option such as “Memory,” “DRAM Configuration,” or something similar that allows you to view information about installed memory modules.
- Verify that the new RAM has been recognized correctly by checking if its capacity matches what you installed.
- Additionally, ensure that other relevant details such as speed (frequency), timings, and voltage are correctly displayed according to the specifications of your new RAM module(s).
- Save any changes made in the BIOS settings (if necessary) and exit the utility.
By verifying that your operating system recognizes and properly detects the upgraded RAM in BIOS settings, you can confirm that your memory upgrade was successful. This step is crucial because if the new RAM is not recognized or configured correctly, it may lead to performance issues or even system instability.
In case you encounter any issues during this process or notice discrepancies in the recognition of your new RAM, consult the documentation that came with your memory modules or seek assistance from a professional technician. They can provide guidance and troubleshooting steps to ensure optimal performance.
Remember, taking this extra step to verify recognition in BIOS after a DRAM memory upgrade will help you fully harness the benefits of increased memory capacity and ensure a smooth and efficient computing experience.
Tags: access quickly, benefits of dram memory upgrade, boosting performance, computer system, demanding tasks, dram memory upgrade, dynamic random access memory, efficiency, fast-paced digital world, handle multiple applications simultaneously without slowdowns or crashes, increased multitasking capabilities, launch applications, main memory, more memory available, multitasking, overall speed and responsiveness, perform tasks, professionals relying on resource-hungry software such as video editing tools/graphic design software/virtual machines, resource-intensive applications, smoother and faster data transfer between cpu and other components of computer, storing data, system memory, upgrading dram