
The Cisco Catalyst Layer 2 Switch: Powering Seamless Network Connectivity
In today’s fast-paced digital world, network connectivity is a critical component for businesses of all sizes. Whether it’s a small office or a large enterprise, having a reliable and efficient network infrastructure is essential for smooth operations. This is where the Cisco Catalyst Layer 2 Switch comes into play.
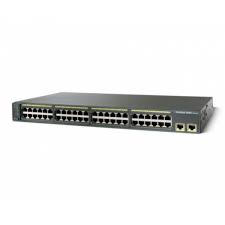
The Cisco Catalyst Layer 2 Switch is a versatile and powerful networking device that provides high-performance switching capabilities. It is designed to handle the demands of modern networks, offering advanced features and functionalities that ensure seamless connectivity.
One of the key strengths of the Cisco Catalyst Layer 2 Switch is its ability to efficiently manage network traffic. With its advanced switching technology, it can intelligently route data packets across multiple ports, optimizing performance and minimizing latency. This ensures that data flows smoothly within the network, enhancing overall productivity and user experience.
Additionally, the Cisco Catalyst Layer 2 Switch offers enhanced security features to protect sensitive data from unauthorized access or malicious attacks. It supports various security protocols and features such as Access Control Lists (ACLs), port security, and VLAN segmentation. These measures help safeguard critical information and prevent potential breaches, providing peace of mind for network administrators.
Furthermore, this switch provides flexibility in terms of scalability and expansion. With its modular design, businesses can easily add or remove modules as per their changing requirements without disrupting the entire network infrastructure. This scalability allows organizations to adapt to evolving needs while minimizing costs associated with unnecessary hardware upgrades.
Another notable feature of the Cisco Catalyst Layer 2 Switch is its comprehensive management capabilities. It offers intuitive web-based interfaces and command-line interfaces that make configuration and monitoring tasks straightforward for IT professionals. Additionally, it supports remote management protocols, enabling administrators to manage multiple switches from a central location efficiently.
The Cisco Catalyst Layer 2 Switch also supports advanced Quality of Service (QoS) mechanisms that prioritize critical applications or services over less important ones. This ensures that bandwidth is allocated appropriately, guaranteeing optimal performance for essential tasks such as voice and video conferencing or real-time data transmission.
In conclusion, the Cisco Catalyst Layer 2 Switch is a reliable and robust networking device that empowers businesses with seamless network connectivity. Its advanced features, security measures, scalability options, and management capabilities make it an ideal choice for organizations looking to enhance their network infrastructure. With the Cisco Catalyst Layer 2 Switch, businesses can unlock the full potential of their networks and stay ahead in today’s highly connected world.
9 Frequently Asked Questions about Cisco Catalyst Layer 2 Switches
- What is the difference between a Cisco Catalyst Layer 2 switch and a Layer 3 switch?
- How do I configure VLANs on a Cisco Catalyst switch?
- How do I enable port security on my Cisco Catalyst switch?
- How do I set up trunking on a Cisco Catalyst switch?
- How do I configure Spanning Tree Protocol (STP) on my Cisco Catalyst switch?
- What are some of the best practices for configuring QoS on a Cisco Catalyst Switch?
- What is the most efficient way to back up my configurations for my Cisco Catalyst switches?
- How can I monitor traffic flows through my Cisco Catalyst switches?
- What are some of the common troubleshooting techniques when working with Cisco Catalyst switches?
What is the difference between a Cisco Catalyst Layer 2 switch and a Layer 3 switch?
The main difference between a Cisco Catalyst Layer 2 switch and a Layer 3 switch lies in their functionality and the level of network intelligence they possess.
A Cisco Catalyst Layer 2 switch operates primarily at the Data Link layer (Layer 2) of the OSI model. It is responsible for forwarding Ethernet frames based on MAC (Media Access Control) addresses. Layer 2 switches are commonly used for creating local area networks (LANs) and segmenting network traffic using VLANs (Virtual Local Area Networks). They provide basic switching capabilities, such as port-based communication and MAC address learning, but do not have built-in routing capabilities.
On the other hand, a Layer 3 switch, also known as a multilayer switch, operates at both the Data Link layer (Layer 2) and the Network layer (Layer 3). In addition to performing all the functions of a Layer 2 switch, a Layer 3 switch has enhanced routing capabilities. It can make intelligent routing decisions based on IP addresses using protocols like IP routing or OSPF (Open Shortest Path First). This allows Layer 3 switches to connect multiple networks together and route traffic between them efficiently.
In summary, while both Cisco Catalyst Layer 2 switches and Layer 3 switches provide switching capabilities, a Layer 3 switch goes beyond by incorporating routing functionality. This enables it to handle more complex network environments where inter-VLAN routing or connectivity with external networks is required. The choice between these two types of switches depends on the specific networking needs and requirements of an organization.
How do I configure VLANs on a Cisco Catalyst switch?
Configuring VLANs on a Cisco Catalyst switch involves a series of steps. Here’s a general guide to help you get started:
- Access the switch: Connect to the switch using a console cable or through SSH/Telnet.
- Enter privileged EXEC mode: Type in the enable command and provide the appropriate password to access privileged EXEC mode.
- Enter global configuration mode: Use the configure terminal command to enter global configuration mode.
- Create VLANs: Use the vlan
command to create VLANs. Replace with the desired VLAN number. Repeat this step for each VLAN you want to create. - Assign names to VLANs (optional): You can assign names to VLANs using the name
command, replacing with your preferred name. - Configure switch ports: To assign access ports to specific VLANs, use the interface
command followed by switchport mode access and switchport access vlan . Replace with the desired interface (e.g., FastEthernet 0/1) and with the appropriate VLAN number. - Configure trunk ports (optional): If you need to carry multiple VLANs across a single trunk link, use the interface
command followed by switchport mode trunk and switchport trunk allowed vlan . Replace with the desired interface and specify a comma-separated list of allowed VLANs in place of . - Verify configurations: Use show vlan brief or show interfaces status commands to verify your VLAN configurations.
- Save configurations: To save your changes, use the copy running-config startup-config command.
Remember that these steps are general guidelines, and specific commands may vary depending on your Cisco Catalyst switch model and software version. It’s always recommended to consult official Cisco documentation or seek assistance from Cisco support for accurate and detailed instructions tailored to your specific switch configuration.
How do I enable port security on my Cisco Catalyst switch?
To enable port security on your Cisco Catalyst switch, follow these steps:
Access the command-line interface (CLI) of your switch using a terminal emulation program or SSH.
Enter privileged EXEC mode by typing “enable” and providing the appropriate password if prompted.
Enter global configuration mode by typing “configure terminal”.
Identify the interface(s) on which you want to enable port security. For example, if you want to enable port security on interface GigabitEthernet1/0/1, enter the following command:
“`
interface GigabitEthernet1/0/1
“`
Enable port security on the selected interface by entering the following command:
“`
switchport port-security
“`
Configure the maximum number of secure MAC addresses allowed on the interface by entering the following command and specifying the desired value (e.g., 5):
“`
switchport port-security maximum
“`
Optionally, configure other parameters such as aging time and violation actions. For example, to set an aging time of 180 seconds and a violation action of shutdown, use these commands:
“`
switchport port-security aging time 180
switchport port-security violation shutdown
“`
Repeat steps 4-7 for any additional interfaces you want to enable port security on.
Once you have finished configuring port security settings, exit global configuration mode by typing “end”.
Save your configuration changes by typing “write memory” or “copy running-config startup-config”.
Port security is now enabled on your Cisco Catalyst switch interfaces, and they will enforce the specified restrictions based on your configuration settings.
How do I set up trunking on a Cisco Catalyst switch?
Setting up trunking on a Cisco Catalyst switch is a straightforward process that involves configuring the appropriate interfaces and VLAN settings. Here’s a step-by-step guide to help you:
- Access the switch: Connect to the switch using a console cable or through SSH/Telnet.
- Enter privileged EXEC mode: Type in the enable command and provide the necessary credentials to access privileged EXEC mode.
- Enter global configuration mode: Type in the configure terminal command to enter global configuration mode.
- Configure VLANs: If you haven’t already configured VLANs, create the necessary VLANs using the vlan
command, where represents the VLAN number. - Configure trunking on an interface: Identify the interface you want to configure as a trunk port (e.g., GigabitEthernet 1/0/1). Use the interface
command to access its configuration settings. - Enable trunking: To enable trunking on the interface, use the switchport mode trunk command.
- Specify allowed VLANs (optional): By default, all VLANs are allowed on a trunk port. However, if you want to restrict certain VLANs, use the switchport trunk allowed vlan
command, where represents a comma-separated list of allowed VLAN numbers. - Verify and save configuration: To verify your configuration, use show interfaces
switchport or show running-config commands. Ensure that your desired settings are reflected correctly. Finally, save your configuration using the write memory or copy running-config startup-config command.
That’s it! You have successfully set up trunking on your Cisco Catalyst switch. Repeat these steps for any additional interfaces you want to configure as trunks.
How do I configure Spanning Tree Protocol (STP) on my Cisco Catalyst switch?
Configuring Spanning Tree Protocol (STP) on your Cisco Catalyst switch is essential for preventing network loops and ensuring a stable network infrastructure. Here are the steps to configure STP on a Cisco Catalyst switch:
- Access the switch: Connect to the switch using a console cable or through SSH/Telnet.
- Enter privileged EXEC mode: Type in the enable command and provide the appropriate password if prompted.
- Enter global configuration mode: Use the configure terminal command to enter global configuration mode.
- Enable STP: Issue the spanning-tree mode command followed by one of the available STP modes (e.g., rapid-pvst, mst, pvst, etc.). For example, to enable Rapid PVST+ (Per VLAN Spanning Tree Plus), use the spanning-tree mode rapid-pvst command.
- Configure VLANs: If you have multiple VLANs on your switch, you need to configure them individually for STP. Use the spanning-tree vlan vlan-id command to enter VLAN configuration mode for each VLAN you want to configure.
- Set STP priority (optional): By default, switches have a priority value of 32768, and the lowest priority becomes the root bridge. If you want to manually set a specific switch as root bridge, use the spanning-tree vlan vlan-id root primary command in VLAN configuration mode.
- Adjust port costs (optional): You can modify port costs to influence STP path selection if desired. Lower costs indicate preferred paths. Use the spanning-tree vlan vlan-id cost cost-value command in VLAN configuration mode to adjust port costs.
- Verify and save configuration: After configuring STP, use show spanning-tree or show spanning-tree vlan vlan-id commands to verify your settings and ensure proper operation. Then save your configuration using copy running-config startup-config or write memory commands.
Remember that these steps provide a basic framework for configuring STP on a Cisco Catalyst switch. Depending on your specific requirements and network setup, you may need to adjust additional parameters or enable other STP features such as BPDU guard, root guard, or loop guard.
Always refer to Cisco’s official documentation and consult with a qualified network professional for comprehensive guidance tailored to your specific environment.
What are some of the best practices for configuring QoS on a Cisco Catalyst Switch?
Configuring Quality of Service (QoS) on a Cisco Catalyst Switch is essential for prioritizing network traffic and ensuring optimal performance for critical applications. Here are some best practices to consider when setting up QoS on a Cisco Catalyst Switch:
- Identify and classify traffic: Begin by identifying the different types of traffic on your network, such as voice, video, data, or critical applications. Classify the traffic based on its importance and assign appropriate priority levels.
- Enable QoS globally: Enable QoS globally on the switch using the command “mls qos” in global configuration mode. This enables QoS features and allows you to configure specific QoS parameters.
- Configure classification: Use classification mechanisms such as access control lists (ACLs), class maps, or match statements to identify and classify different types of traffic based on criteria like source/destination IP addresses, protocols, or VLANs.
- Define policy maps: Create policy maps that define how each class of traffic should be treated. Assign appropriate bandwidth limits, queueing mechanisms (such as priority queuing or weighted fair queuing), and drop thresholds for each class.
- Apply policy maps: Apply the configured policy maps to specific interfaces or VLANs using the “service-policy” command in interface configuration mode. This ensures that the defined policies are enforced on the desired traffic flows.
- Monitor and fine-tune: Regularly monitor network performance using tools like NetFlow or SNMP to identify any bottlenecks or areas where QoS adjustments may be needed. Fine-tune your QoS configurations based on observed network behavior and user requirements.
- Use Auto-QoS features: Cisco Catalyst Switches offer Auto-QoS features that can simplify QoS configuration for common applications like voice or video conferencing. These features automatically generate QoS configurations based on predefined templates, reducing manual configuration effort.
- Prioritize control plane traffic: Ensure that control plane traffic, such as routing protocols or management traffic, is given appropriate priority to maintain stability and manageability of the switch. Use control plane policing or control plane protection mechanisms to protect against excessive traffic.
- Test and validate: After configuring QoS, perform thorough testing to verify that the desired prioritization is being applied correctly. Use tools like IP SLA (Service Level Agreement) or network monitoring software to measure and validate QoS effectiveness.
- Document your configurations: Maintain detailed documentation of your QoS configurations, including class maps, policy maps, and applied interfaces/VLANs. This documentation will be valuable for troubleshooting, future reference, or when scaling up your network infrastructure.
Following these best practices will help ensure that your Cisco Catalyst Switch is configured optimally for QoS, allowing you to prioritize critical traffic and deliver a consistent quality of service across your network infrastructure.
What is the most efficient way to back up my configurations for my Cisco Catalyst switches?
When it comes to backing up configurations for Cisco Catalyst switches, there are a few efficient methods you can consider. Here are some recommended approaches:
Manual Configuration Backup:
The simplest method is to manually copy and save the configuration file from each switch. Access the switch’s command-line interface (CLI) using SSH or console connection, then use the “show running-config” command to display the configuration. Copy and paste the output into a text file and save it on a secure location such as a network drive or cloud storage.
TFTP Server:
Set up a Trivial File Transfer Protocol (TFTP) server on your network. Cisco devices support TFTP, which allows you to transfer files between devices over the network. Configure the switch to backup its configuration to the TFTP server using commands like “copy running-config tftp” or “copy startup-config tftp”. This method automates the backup process, making it easier and faster.
Network Configuration Management Tools:
Consider using network configuration management tools such as Cisco Prime Infrastructure, SolarWinds Network Configuration Manager, or ManageEngine Network Configuration Manager. These tools provide centralized management of network devices, including automated backups of configurations. They offer features like scheduled backups, version control, and easy restoration options.
Configuration Archive:
Some switches have built-in features like Configuration Archive or Archive Command Scheduler (ACS). These features allow you to schedule automatic backups at regular intervals and store them in flash memory or external storage devices connected to the switch.
Automated Scripting:
If you have scripting skills, you can write scripts using tools like Python with libraries such as Paramiko or Netmiko to automate configuration backups for multiple switches simultaneously. These scripts can connect to switches via SSH or Telnet protocols and execute commands to retrieve configurations automatically.
Remember that regardless of the method chosen, it is crucial to regularly test your backup files by restoring them to a test switch or simulator to ensure they are valid and complete. Additionally, securely store your backup files in multiple locations, preferably offline or encrypted, to protect them from unauthorized access or data loss.
How can I monitor traffic flows through my Cisco Catalyst switches?
Monitoring traffic flows through Cisco Catalyst switches can be achieved through various methods. Here are a few options:
- Cisco Network-Based Application Recognition (NBAR): NBAR is a feature that allows you to identify and classify network traffic based on protocols, applications, or services. By enabling NBAR on your Catalyst switch, you can gain visibility into the types of traffic flowing through your network.
- NetFlow: NetFlow is a Cisco protocol that provides detailed information about network traffic flows. By configuring NetFlow on your Catalyst switch, you can collect data such as source and destination IP addresses, ports, protocols, and amount of data transferred. This information can be exported to a NetFlow collector for analysis and monitoring purposes.
- Simple Network Management Protocol (SNMP): SNMP allows you to monitor and manage network devices, including Catalyst switches, by collecting various statistics and performance data. By enabling SNMP on your switch and using an SNMP management tool, you can monitor traffic utilization, interface statistics, errors, and other relevant information.
- Port Mirroring/SPAN (Switched Port Analyzer): Port mirroring or SPAN allows you to copy the traffic from one or more ports on your Catalyst switch to another port for monitoring purposes. By configuring port mirroring or SPAN sessions, you can send the mirrored traffic to a monitoring device or software tool that captures and analyzes the traffic flows.
- Embedded Packet Capture: Some Cisco Catalyst switches support embedded packet capture functionality. This feature allows you to capture packets directly on the switch itself for analysis purposes. You can specify filters based on specific criteria such as source/destination IP addresses or protocols to capture only relevant packets.
- Third-Party Network Monitoring Tools: There are numerous third-party network monitoring tools available in the market that support monitoring Cisco Catalyst switches. These tools provide comprehensive visibility into network traffic flows, performance metrics, and other relevant information in a centralized dashboard.
It’s important to note that the availability and specific methods may vary depending on the model and software version of your Cisco Catalyst switch. It’s recommended to refer to the official Cisco documentation or consult with a network specialist to determine the most suitable monitoring method for your specific switch model and requirements.
What are some of the common troubleshooting techniques when working with Cisco Catalyst switches?
When troubleshooting Cisco Catalyst switches, there are several common techniques that can help identify and resolve issues efficiently. Here are some of the key troubleshooting techniques:
- Check physical connections: Ensure that all cables are securely connected to the appropriate ports on the switch and the connected devices. Verify that there are no loose or damaged cables.
- Verify power supply: Check if the switch is receiving power and that all power cables are properly connected. Look for any signs of power-related issues such as LED indicators not lighting up.
- Review interface status: Use the “show interfaces” command to check the status of individual switch interfaces. Look for any errors or anomalies, such as excessive collisions, drops, or errors.
- Monitor system logs: Review system logs and error messages using commands like “show log” or “show logging.” This can provide valuable information about any critical events or errors occurring on the switch.
- Check VLAN configurations: Verify VLAN configurations on both the switch and connected devices to ensure they match. Incorrect VLAN settings can lead to connectivity problems.
- Test connectivity with ping: Use the ping command to test connectivity between devices within the network. This helps identify any network connectivity issues, such as packet loss or high latency.
- Verify spanning tree protocol (STP) status: Ensure that Spanning Tree Protocol is properly configured and functioning correctly to prevent loops in the network topology.
- Troubleshoot port security: If port security is enabled, verify its configuration and check for any violations or unauthorized MAC addresses being blocked.
- Analyze CPU utilization: Monitor CPU utilization using tools like “show processes cpu history” to identify any abnormal spikes in CPU usage that may indicate performance issues or excessive traffic.
- Update firmware and software: Check if there are any available firmware updates for your Cisco Catalyst switch model and consider upgrading if necessary, as newer versions often include bug fixes and performance improvements.
- Consult Cisco documentation and support: If you encounter complex or persistent issues, consult Cisco’s official documentation, knowledge base, or reach out to their technical support for further assistance.
Remember, troubleshooting techniques may vary depending on the specific issue and switch model. It’s important to have a good understanding of Cisco IOS commands and network fundamentals to effectively troubleshoot and resolve problems with Cisco Catalyst switches.
Tags: access control lists acls, advanced features, businesses, cisco catalyst layer 2 switch, data packets routing, efficient, enhanced security features, functionalities, latency minimization, malicious attacks prevention, modern networks, modular design, network connectivity, network infrastructure, network traffic management, performance optimization, port security, productivity enhancement, reliable, scalability and expansion flexibility, security protocols, sensitive data protection, switching capabilities, unauthorized access prevention, user experience improvement, vlan segmentation