
The Cisco SPA504G: A Reliable and Feature-Rich IP Phone
In today’s fast-paced business environment, having a reliable and efficient communication system is crucial for the success of any organization. The Cisco SPA504G IP phone is a top choice for businesses seeking a robust and feature-rich communication solution.
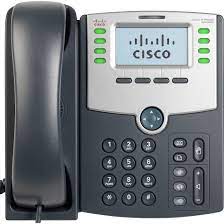
The Cisco SPA504G offers an array of impressive features that enhance productivity and streamline communication within the workplace. Equipped with a high-resolution backlit display, this phone provides clear visibility of call information, caller ID, and other essential details. The intuitive menu navigation makes it easy to access various functions, ensuring user-friendly operation.
One notable feature of the Cisco SPA504G is its support for multiple lines. With four line keys, users can handle multiple calls simultaneously, making it ideal for busy professionals who need to manage various conversations at once. Additionally, the phone supports up to two expansion modules, enabling even greater call capacity.
Another advantage of the Cisco SPA504G is its compatibility with various VoIP platforms. Whether you are using a hosted VoIP service or an on-premises IP PBX system, this phone seamlessly integrates with different platforms, ensuring flexibility and scalability for your business needs.
For enhanced call management capabilities, the Cisco SPA504G offers advanced features such as call waiting, call forwarding, call transfer, and three-way conference calling. These features empower users to handle calls efficiently and collaborate effectively with colleagues or clients.
Security is always a paramount concern in business communications. The Cisco SPA504G addresses this concern by implementing industry-standard encryption protocols to protect sensitive voice data from unauthorized access. This ensures that your conversations remain secure and confidential.
Furthermore, the Cisco SPA504G supports Power over Ethernet (PoE), eliminating the need for additional power cables and adapters. This not only simplifies installation but also reduces clutter around your workspace.
In terms of design and durability, the Cisco SPA504G boasts a sleek and ergonomic design that fits seamlessly into any office environment. The phone is built to withstand the demands of everyday use, ensuring long-lasting performance and reliability.
In conclusion, the Cisco SPA504G IP phone offers a comprehensive set of features that cater to the communication needs of businesses large and small. From its user-friendly interface to its robust call management capabilities, this phone is designed to enhance productivity and streamline communication workflows.
Whether you are a small business looking for an affordable yet powerful IP phone or a larger enterprise seeking scalability and advanced features, the Cisco SPA504G is a reliable choice. With its compatibility with various VoIP platforms and commitment to security, this IP phone delivers exceptional performance and value for your business communication needs.
Frequently Asked Questions about Cisco SPA504G IP Phone
- How do I transfer a call on my Cisco IP phone SPA504G?
- How do I setup my Cisco IP phone SPA508G?
- What is admin password for Cisco SPA504G?
- How to configure Cisco SPA504G?
How do I transfer a call on my Cisco IP phone SPA504G?
Transferring a call on your Cisco IP phone SPA504G is a simple process. Here’s a step-by-step guide to help you transfer calls effectively:
During an active call, press the “Transfer” softkey on your phone’s display. This will place the current call on hold.
You will hear a dial tone after pressing the “Transfer” softkey. Dial the number or extension to which you want to transfer the call.
Once you have entered the desired number or extension, you have two options:
– To complete an unannounced transfer: Simply hang up your phone after dialing the number or extension. The call will be transferred immediately.
– To complete an announced transfer: Wait for the recipient to answer the call before completing the transfer. You can speak with them privately to provide any necessary information about the caller before transferring.
If you choose to complete an announced transfer, after dialing and waiting for the recipient to answer, press the “Transfer” softkey again to complete the transfer and hang up your phone.
If you need to cancel or cancel and return to a held call while attempting a transfer, press the “Cancel” softkey instead of completing the transfer process.
Please note that specific features and functionalities may vary depending on your phone’s configuration and any additional settings implemented by your organization’s phone system administrator. It is always recommended to consult your organization’s IT department or refer to user manuals for further assistance tailored to your specific setup.
How do I setup my Cisco IP phone SPA508G?
Setting up your Cisco IP phone SPA508G is a straightforward process. Here are the steps to get you started:
Connect the Network: Start by connecting your IP phone to your network. Use an Ethernet cable to connect the LAN port on the back of the phone to an available Ethernet port on your network switch or router.
Power Connection: Next, you have two options for powering your phone. You can either connect it using Power over Ethernet (PoE) or use a power adapter. If using PoE, ensure that your network switch or router supports PoE and is properly configured. If using a power adapter, plug one end into the power port on the back of the phone and the other end into a power outlet.
Wait for Boot-Up: Once connected to both power and network, wait for your Cisco IP phone SPA508G to boot up completely. This process may take a few minutes.
Obtain IP Address: Your IP phone needs an IP address to function correctly on your network. There are two ways to obtain an IP address:
– DHCP: By default, most networks use Dynamic Host Configuration Protocol (DHCP) to assign IP addresses automatically. In this case, your phone should receive an IP address from your network’s DHCP server automatically.
– Static IP: If you prefer to assign a static IP address manually, access the phone’s settings menu by pressing the Setup button (paper icon) followed by 9-0-0 (factory reset code). Navigate through the menu using arrow keys until you find “Network.” Enter the desired static IP address, subnet mask, default gateway, and DNS server information.
Configure SIP Settings: To use your Cisco SPA508G with a VoIP service provider or PBX system, you need to configure SIP settings specific to your provider or system. Access the settings menu by pressing Setup followed by 1-1-0 (admin password). Navigate to “SIP” settings and enter the required information, such as SIP server address, authentication credentials, and other relevant details provided by your service provider or system administrator.
Test and Make Calls: Once you have completed the setup process, your Cisco IP phone SPA508G should be ready to use. You can test it by making a call to another phone or testing its functionality with your VoIP service provider or PBX system.
Remember that these steps provide a general overview of the setup process. For more detailed instructions or specific configuration requirements, refer to the user manual provided by Cisco or consult with your network administrator or service provider.
What is admin password for Cisco SPA504G?
The default admin password for the Cisco SPA504G IP phone is usually “admin” (without the quotation marks). However, it’s important to note that for security reasons, it is highly recommended to change the default password to a unique and strong password as soon as possible. This helps protect your device and network from unauthorized access.
How to configure Cisco SPA504G?
Configuring the Cisco SPA504G IP phone is a straightforward process. Here are the steps to get you started:
- Connect the IP Phone: Start by connecting your Cisco SPA504G to your network using an Ethernet cable. Ensure that the phone is powered on and connected to a power source if you are not using Power over Ethernet (PoE).
- Access the Web Interface: Open a web browser on your computer and enter the IP address of the phone in the address bar. The default IP address for the Cisco SPA504G is typically 192.168.1.100, but it may vary depending on your network configuration.
- Log in to the Web Interface: On the login page, enter the default username and password, which are usually “admin” for both fields unless they have been changed by your network administrator.
- Basic Configuration: Once logged in, you will see various tabs and settings options. Start with basic configurations such as setting up date and time, language preferences, and network settings like IP address assignment (static or DHCP).
- SIP Settings: Navigate to the “SIP” or “Line” tab to configure SIP settings for your VoIP service provider or IP PBX system. Enter details such as SIP server address, authentication credentials, and other required information provided by your service provider.
- User Extensions: If you have multiple lines or extensions associated with your Cisco SPA504G, configure them under the “Ext 1” or similar tab. Enter extension numbers, display names, voicemail settings, and any additional features required.
- Call Features: Explore other tabs related to call features such as call forwarding, call waiting, call transfer, speed dialing, and more based on your specific requirements.
- Audio Configuration: Adjust audio settings like speaker volume, headset options (if applicable), ringtone preferences, and other audio-related parameters under the “Voice” or “Audio” tab.
- Security Settings: It is important to secure your IP phone to protect against unauthorized access. Consider configuring security settings like password changes, encryption protocols, and access restrictions under the “Security” tab.
- Save Configuration: Once you have completed the desired configurations, remember to save your changes by clicking on the “Save” or “Apply” button located at the bottom or top of each configuration page.
- Reboot and Test: After saving the configuration, it is recommended to reboot the Cisco SPA504G IP phone for the changes to take effect. Once it restarts, make test calls and verify that all features are functioning as expected.
Please note that these steps provide a general overview of configuring the Cisco SPA504G IP phone. The specific configuration process may vary depending on your network environment and VoIP service provider requirements. It is advisable to consult the user manual or seek assistance from your network administrator or service provider for detailed instructions tailored to your setup.
Tags: advanced features, affordable yet powerful ip phone, businesses, call forwarding, call management capabilities, call transfer, call waiting, caller id, cisco spa504g, commitment to security, communication system, compatibility with various voip platforms, design and durability, encryption protocols, exceptional performance, expansion modules, feature-rich, high-resolution backlit display, ip phone, larger enterprise, menu navigation, multiple lines, organization, power over ethernet poe, productivity, reliable, robust, scalability, security protocols, sleek and ergonomic design, small business, three-way conference calling, value for business communication needs, voip platforms